How to Configure a VMware ESXi Cluster
Modern virtual environments demand both resilience and scalability, especially as workloads continue to become increasingly complex. A properly built VMware ESXi cluster is the backbone of high availability, efficient resource usage and simplified infrastructure management.
When configured correctly, an ESXi cluster enables centralized control, fault tolerance and seamless workload mobility across hosts. However, building a cluster requires careful planning and precise configuration at every stage. Read this post to learn how to configure a VMware ESXi cluster step by step.
VMware Cluster Requirements
After installing VMware vCenter, you need the following to create a cluster:
- A datacenter in the vCenter inventory;
- Sufficient vSphere permissions;
- vSAN enabled if you want to use VMware vSAN.
The hardware requirements to use ESXi clustering features are:
- Two or more ESXi hosts with the same processors or processors of the same family/generation. You can use the EVC mode for clusters if the processors belong to different families.
- Shared storage to store data for VMs that can run on any of the hosts.
- Dedicated high-speed and low-latency networks for cluster management, VM migration (vMotion), accessing storage, sending heartbeats and Fault Tolerance logging traffic (if you plan on using Fault Tolerance in the vSphere cluster).
Creating a Datacenter for VMware ESXi Cluster
You can start creating a cluster once you connect to the vCenter Server’s Web UI in VMware vSphere Client.
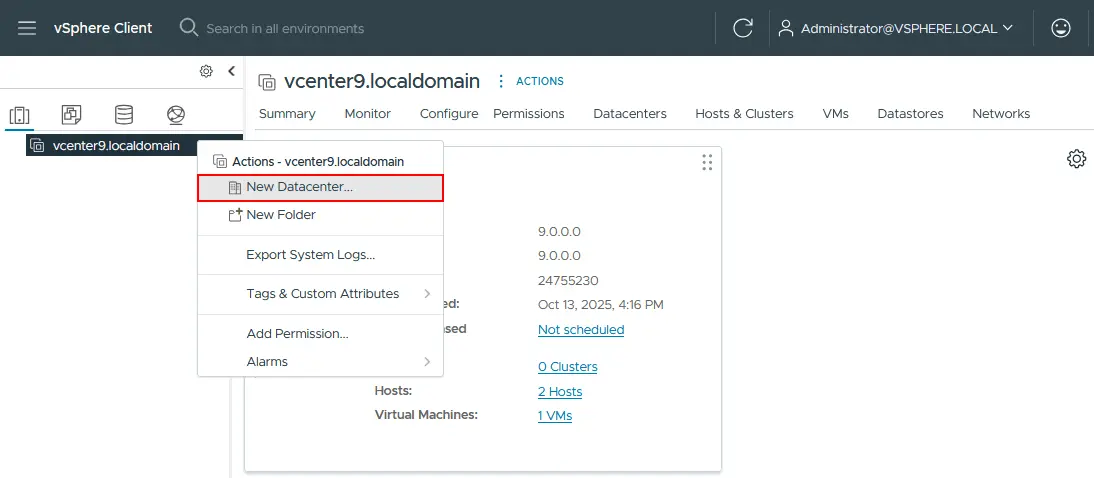
- Right-click on your vCenter Server in the Web UI and choose New Datacenter. The datacenter contains all the different types of objects needed to work in the virtual infrastructure, including hosts, VMs, networks, datastores and more.
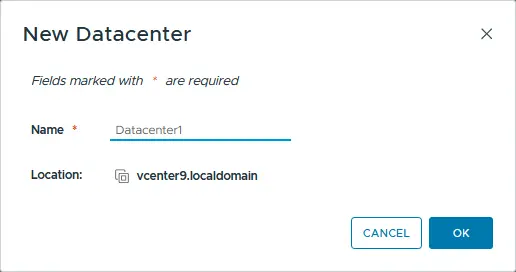
- Next, we assign a name to the datacenter (for example, Datacenter1). Click OK to save settings.
Watch the video below to learn how to add VMware vCenter servers and ESXi hosts to NAKIVO Backup & Replication.
Adding ESXi Hosts to the Datacenter
You have two approaches to configuring the vCenter inventory and creating an ESXi cluster:
- Adding ESXi hosts to the datacenter, creating a cluster and adding the ESXi hosts that are already in the datacenter to the cluster. (The approach used in this post)
- Creating a new cluster in the datacenter and directly adding ESXi hosts to the cluster.
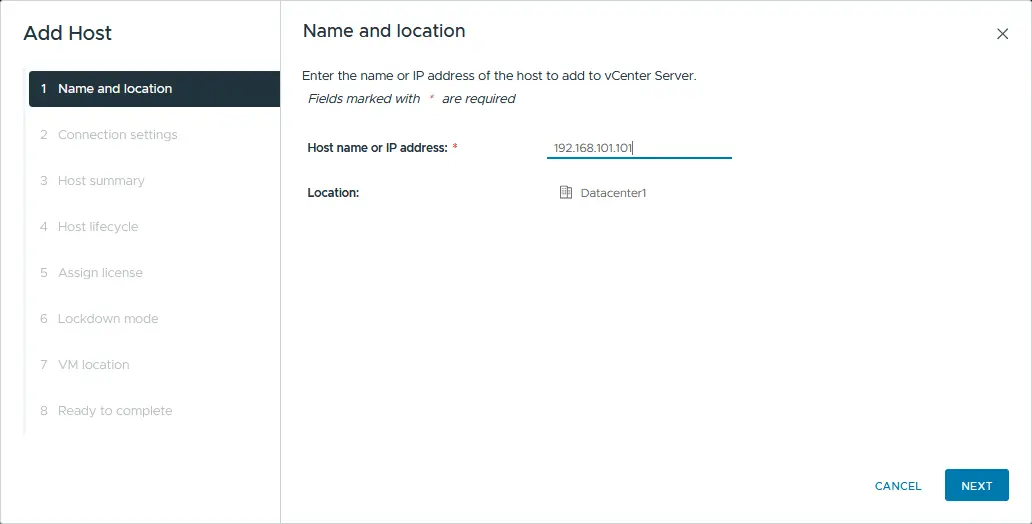
Right-click the datacenter in vSphere Client and select Add Host from the context menu.
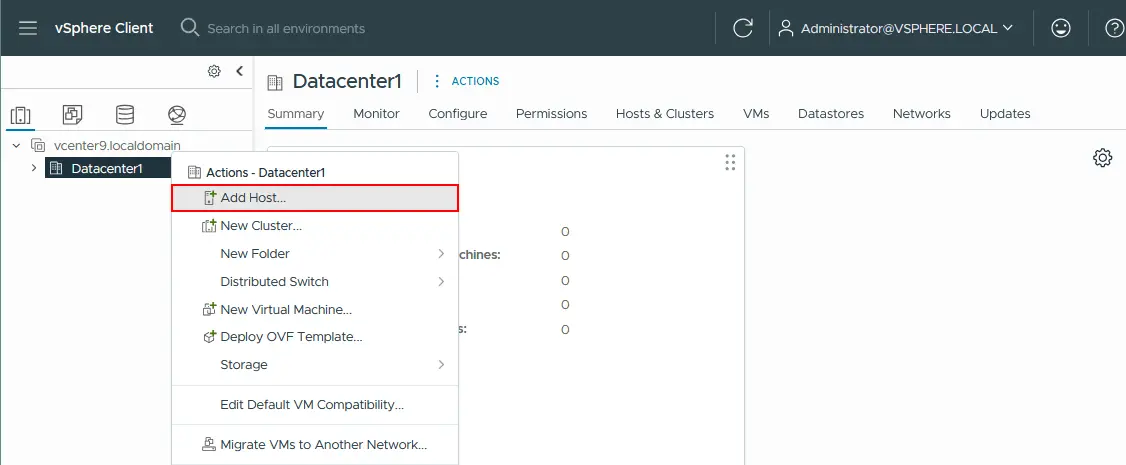
The Add Host wizard is launched.
- Name and location. Enter the IP address of the ESXi host you want to add to the selected datacenter. Click Next at each step to continue.
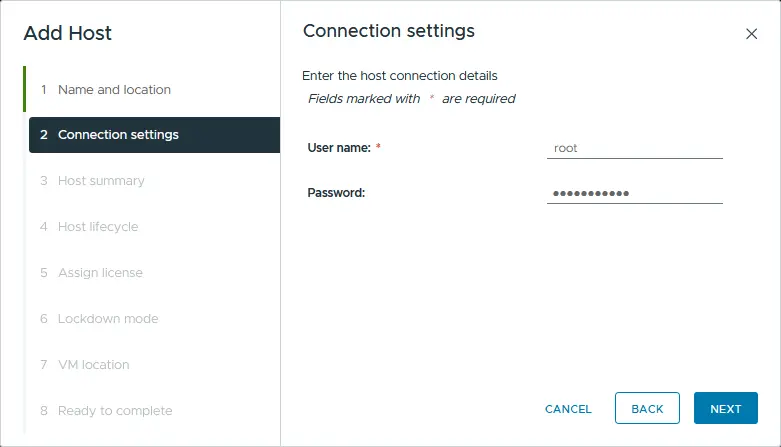
- Connection settings. Enter the administrative credentials of the ESXi host you’re adding.
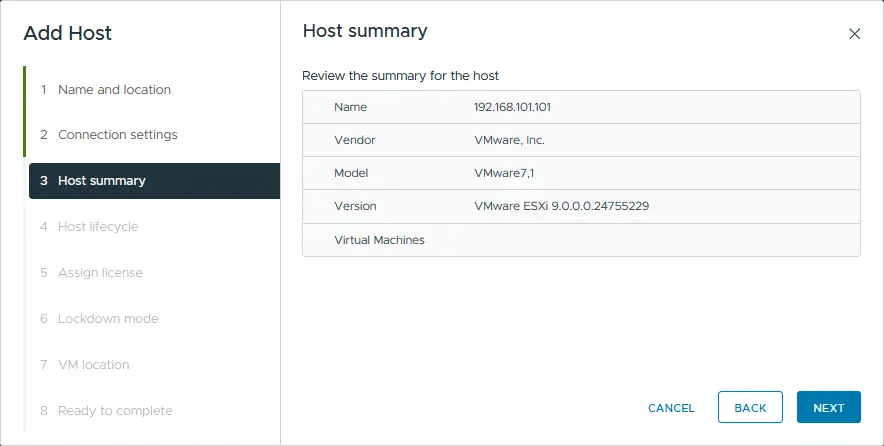
- Host summary. The Host summary screen displays the VMs present on the host, if any. You can also see other information about the ESXi host.
- Host lifecycle. Select the method to set up the host image. The image is needed to specify the software and firmware to be installed, updated or upgraded on the host.

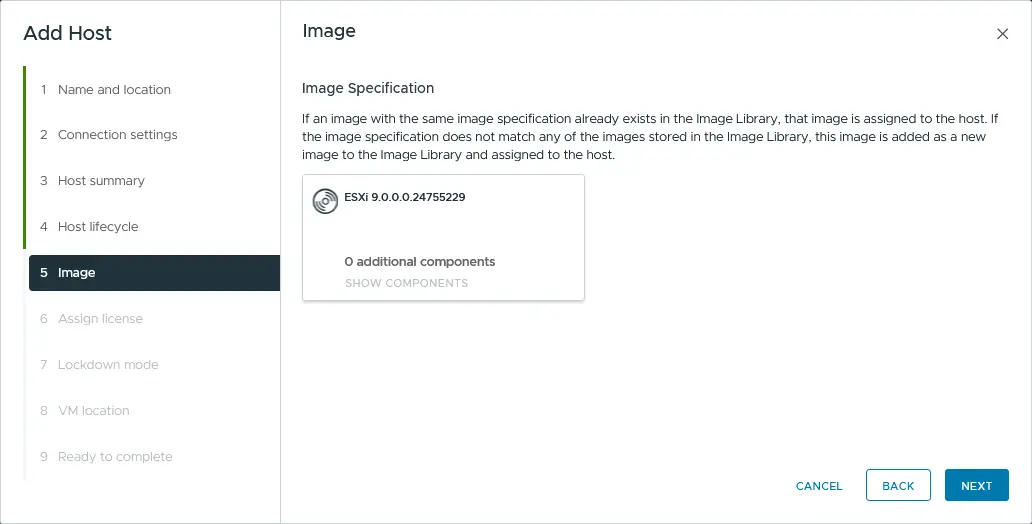
- Image. Check the image specifications and proceed to the next step.
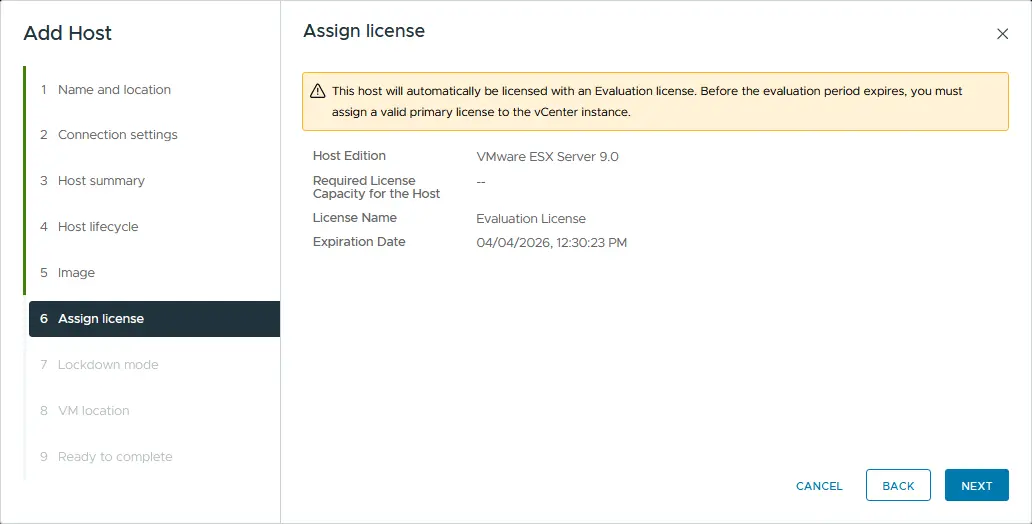
- Assign license. You can select the license you want to use on the host. You can choose the evaluation license and keep using the trial for 60 days. Note that there are limitations in the Free ESXi version, and you cannot use it to build an ESXi cluster. Read more about VMware vSphere licensing.
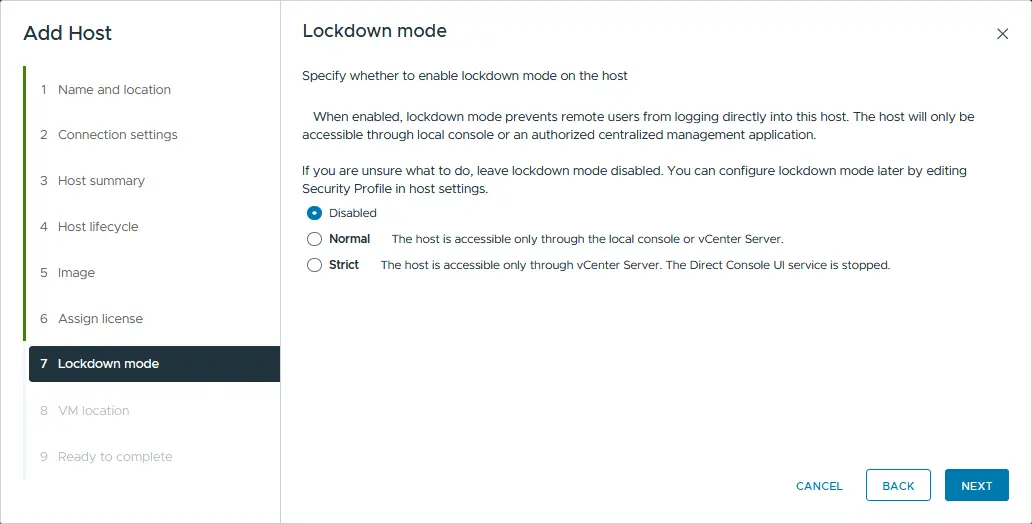
- Lockdown mode. Lockdown mode prevents remote users from logging directly into the host. This option provides additional security and can be enabled later.
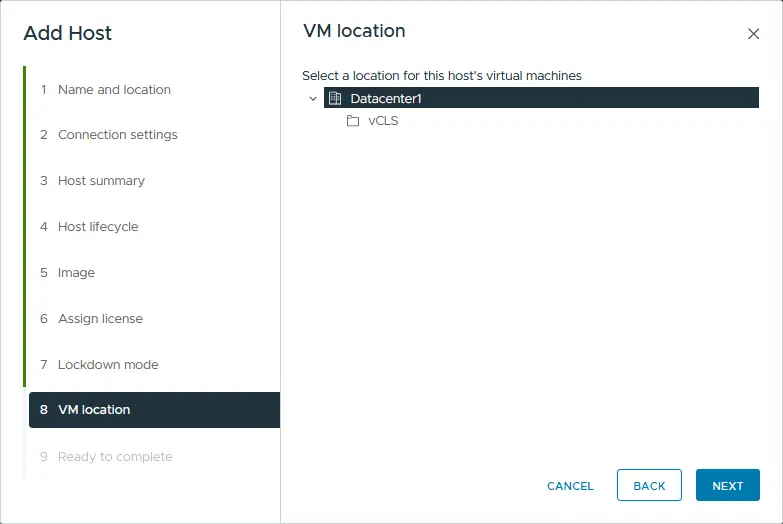
- VM location. Select the VM location. Since we have only one data center, it is selected by default.
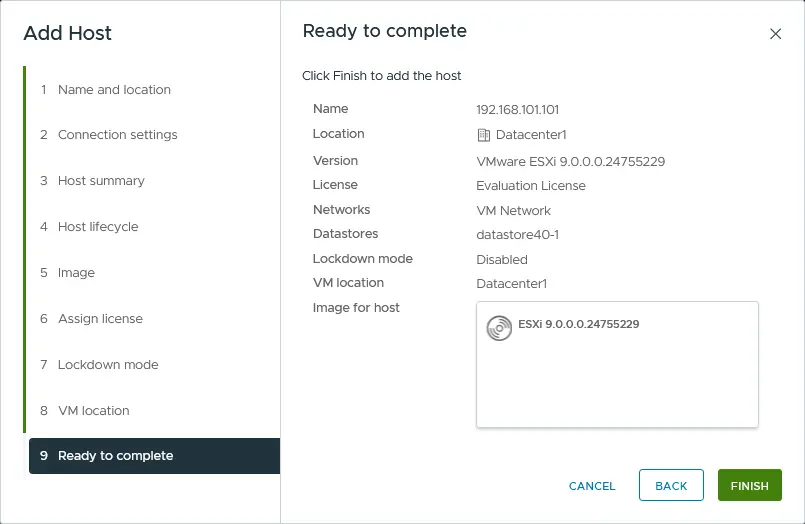
- Ready to complete. Finally, you can add the host to the datacenter. Continue this process for all the hosts you want to add to the vSphere cluster. Click Finish.
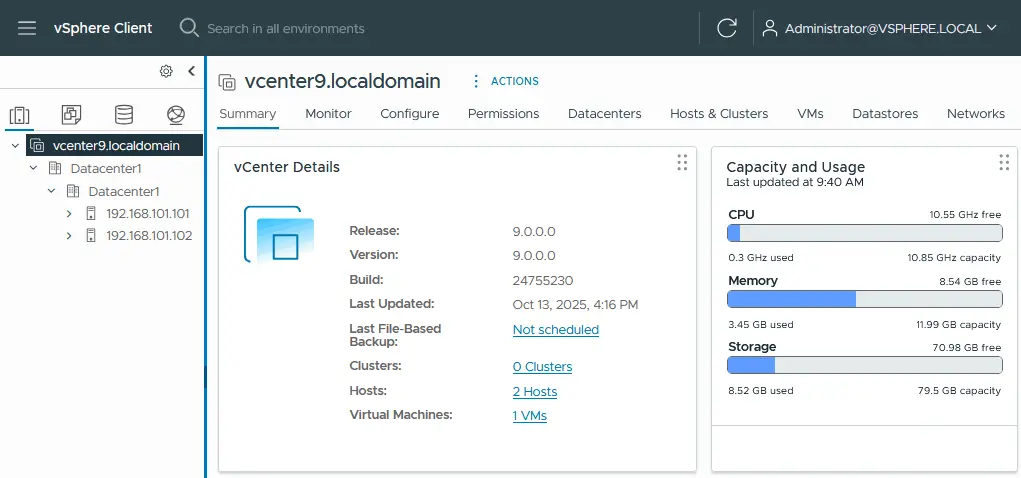
You can see two ESXi hosts added to the datacenter in the VMware vCenter inventory in the screenshot below.
How to Create a New ESXi Cluster
Once the datacenter is created and ESXi hosts are added, you can create a new vSphere cluster.
-
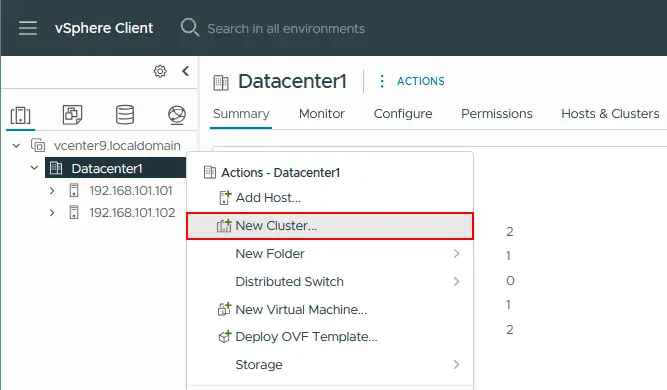
Right-click the datacenter and click New Cluster.
-
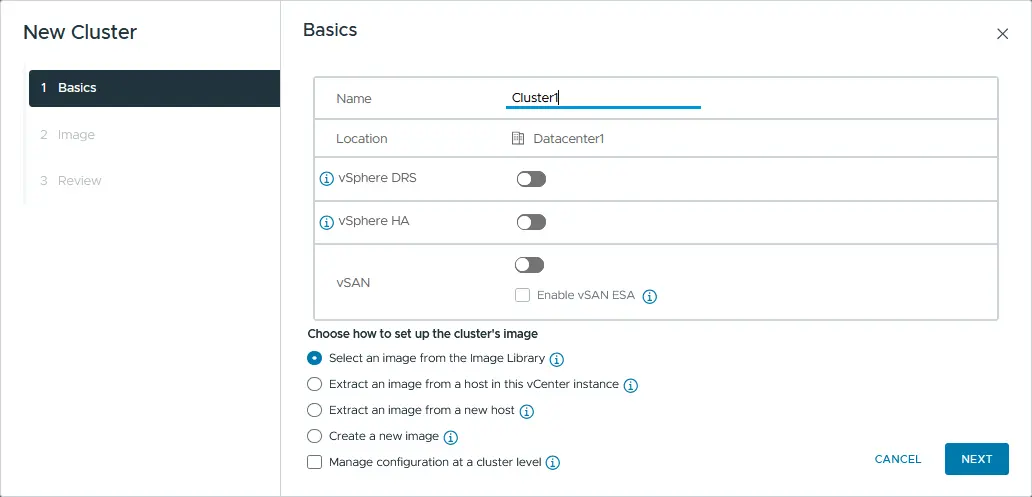
Assign a cluster name (for example, Cluster1) and click OK. Later, you can edit the cluster options displayed on this screen and configure HA, DRS and vSAN. At the bottom of the screen, choose how to set up the cluster’s image. This option is required to provide consistent ESXi host images on all cluster nodes, which is recommended for clustering features like VM migration.
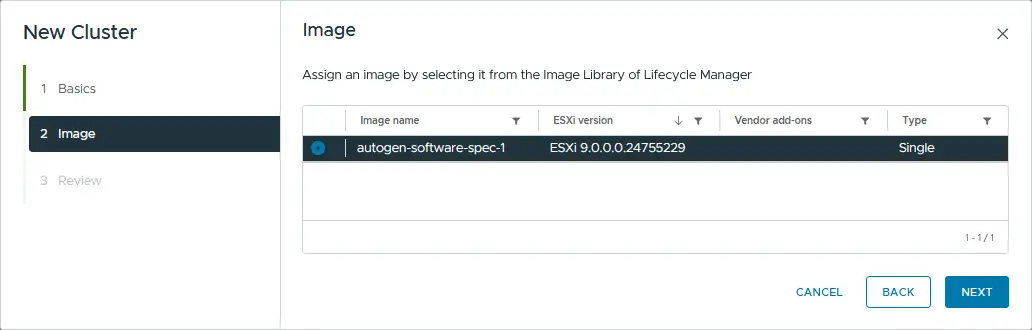
- Select an ESXi host image based on the selected option.
- Once the cluster object is added, you can add ESXi hosts to it. Right-click the cluster name in VMware vSphere Client and select Add Hosts from the menu that opens. Once the host is added to the cluster, its resources become part of the cluster’s resources. The cluster manages the resources of all hosts.
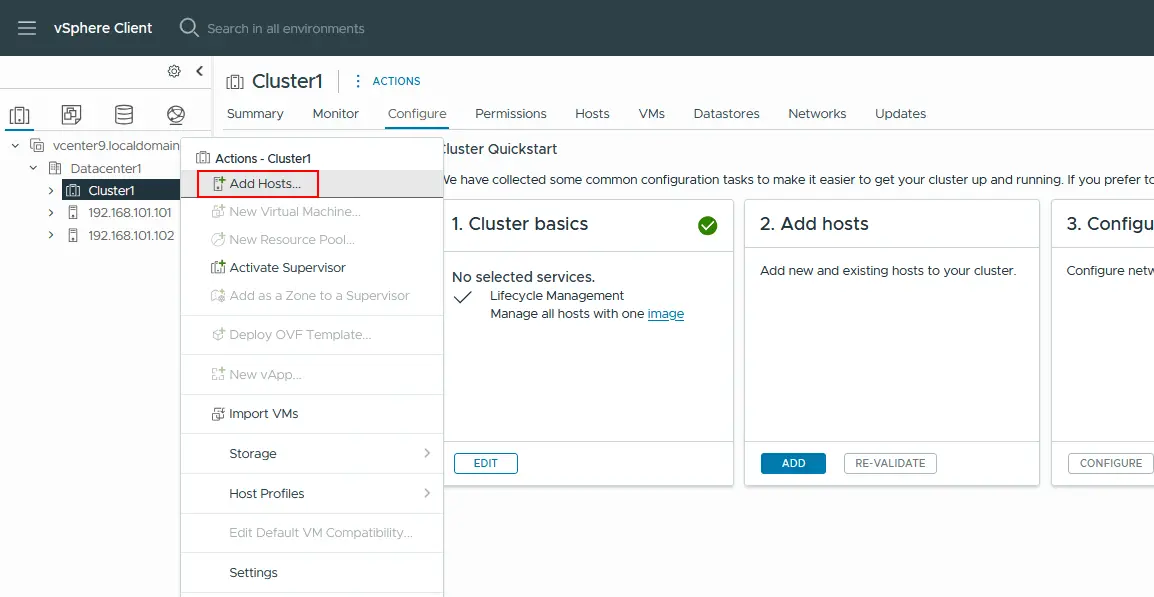
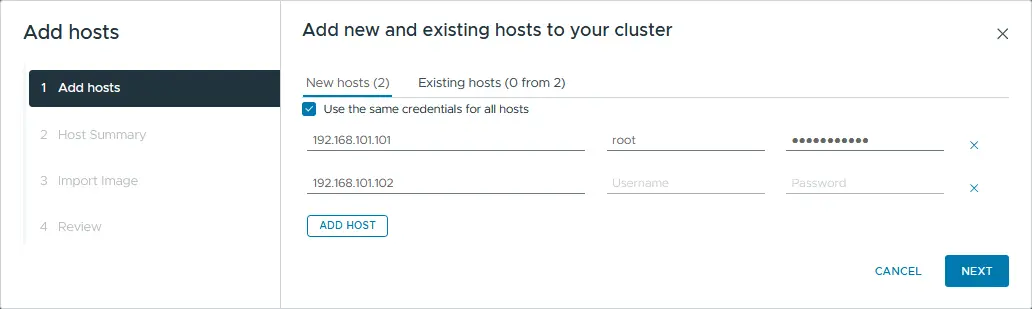
- The Add Host wizard begins. Enter the name or IP address of the host to add it to the cluster. Provide the credentials to access the host. In vCenter 9, you can simultaneously add multiple ESXi hosts to a cluster.
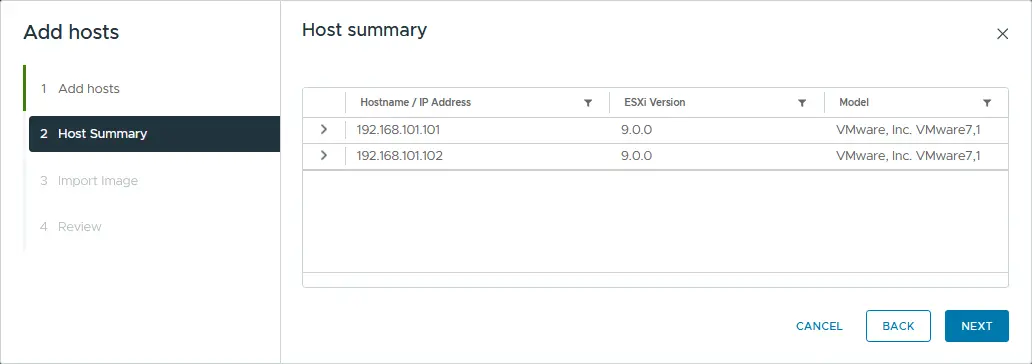
- Check the host summary for the ESXi hosts you previously selected.
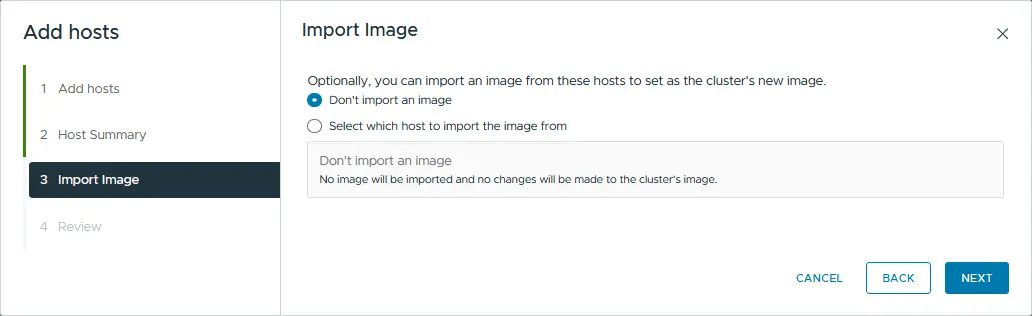
- Choose the import image option. Optionally, you can import an image from these hosts to set as the cluster’s new image.
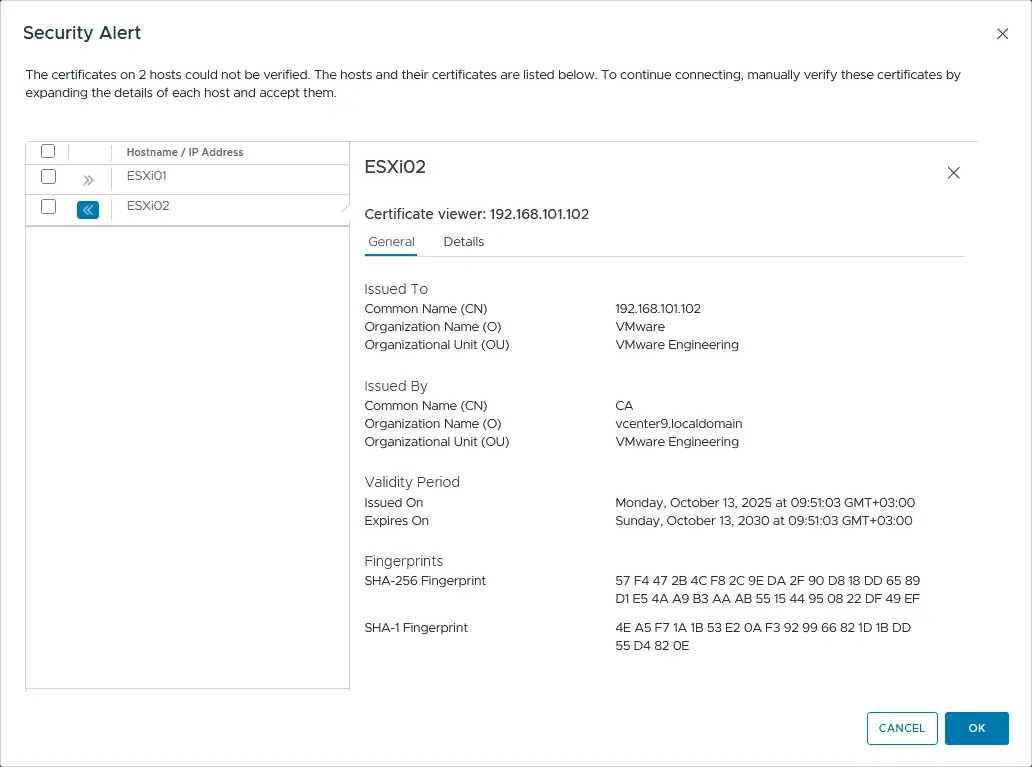
- You may receive a certificate alert. Select the certificates for the needed hosts and click OK to accept them and continue the connection. This is a common warning with self-signed certificates present on the hosts by default.
- Review your settings and click Finish to add the ESXi host to your ESXi cluster.

-
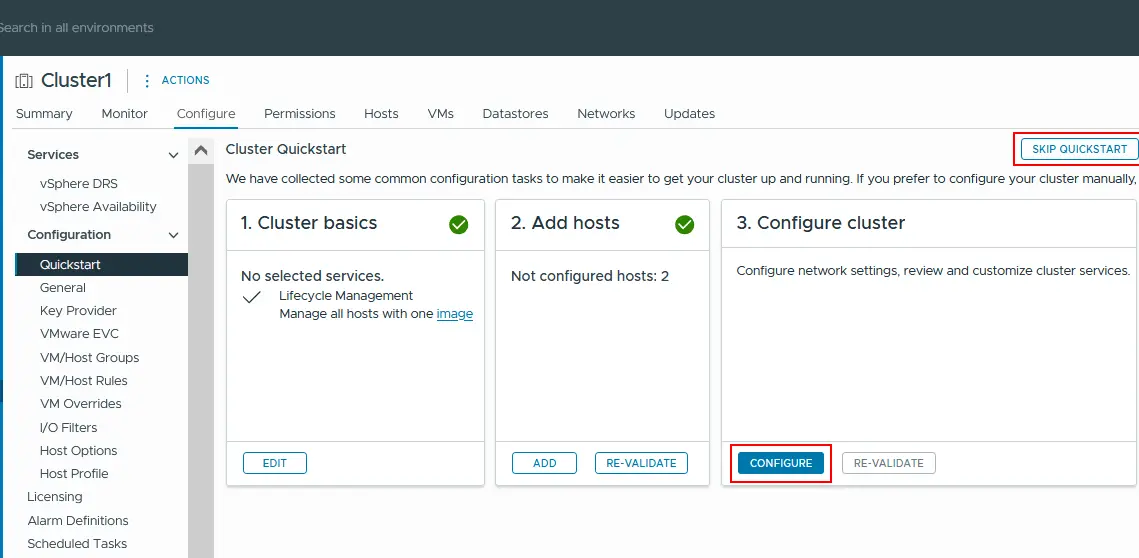
After creating the cluster, the cluster nodes are in maintenance mode. In the Quickstart section of the Configure tab, the Configure cluster step was not completed. You can click Configure or Skip Quickstart to complete HA and DRS configuration manually later.
- The datacenter, cluster and two ESXi hosts joined the vSphere cluster.
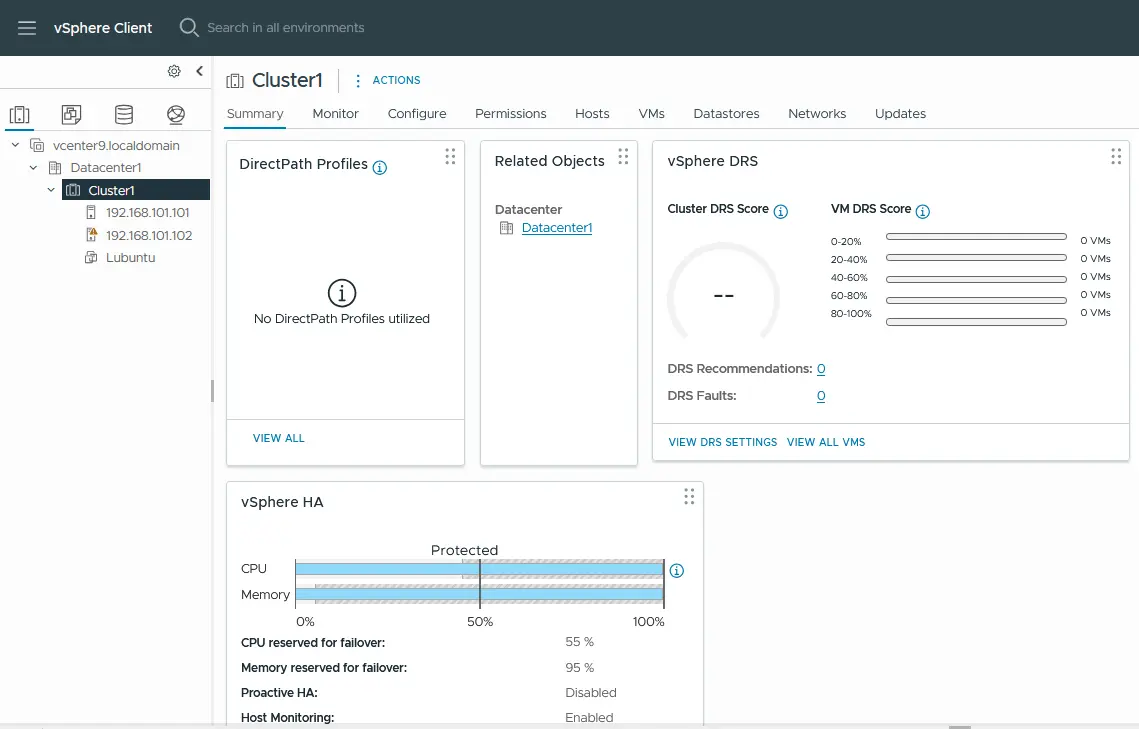
Now you can configure High Availability (HA) and Distributed Resource Scheduler (DRS) in your vSphere cluster. After configuring HA, you can configure fault tolerance.
Conclusion
Configuring a reliable VMware ESXi cluster is a critical step toward achieving high availability, scalability and efficient virtual infrastructure management. By following proper planning, meeting technical requirements and correctly adding hosts and cluster settings, you create a stable foundation for long-term operations. A well-designed vSphere cluster reduces downtime risks while improving performance and workload flexibility. With the right configuration approach, your virtual environment becomes both resilient and future-ready.