Explore What’s New in NAKIVO Backup & Replication v11
Try the new backup and ransomware protection features and get the latest enhancements and updates.
Try the Latest Version
What’s New in v11.1 Beta

Multilingual Interface
Global accessibility and customization
NAKIVO Backup & Replication now supports French, German, Italian, Polish and Chinese in addition to English and Spanish. Manage your backup and recovery operations more efficiently without language barriers. Reduce training time and improve user adoption by using the solution in your preferred language.

Direct Connect for MSPs
Simplified, portless tenant connection
Connect securely to your tenants’ environments— no open ports required on tenants’ side. Simplify deployment and speed up tenant onboarding without additional network configurations. Leverage encrypted, portless connections to ensure secure communications between the MSP Director and tenants’ environments. Direct Connect also extends support to include Hyper-V and Proxmox VE along with VMware and Physical machines. This enables MSPs to create opportunities in new markets and expand their customer base.
How to Claim Your Amazon eGift Cards
- Download v11.1 Beta and complete one or more of the following test options to earn Amazon eGift Cards.
- Send the support bundle indicating the option you chose to support@nakivo.com by June 3rd, 2025.
- Lorem ipsum dolor sit amet, consectetur adipisicing elit. A, adipisci blanditiis debitis dolor dolores, doloribus eius ex exercitationem explicabo facilis iste laborum officiis quo, repudiandae sit tenetur velit veniam vero.
- Share your feedback by filling out a short survey.
- Testing all four options (Any new feature + Direct Connect for MSPs + Real-Time Replication for VMware+Backup to Cloud for Microsoft 365) will earn you a total of $120 in gift cards.
- Testing all four options (Any new feature + Direct Connect for MSPs + Real-Time Replication for VMware+Backup to Cloud for Microsoft 365) will earn you a total of $120 in gift cards.

Test option 1
Direct Connect for MSPs
Before proceeding, ensure the following prerequisites are met:
- In your multi-tenant deployment of NAKIVO Backup & Replication, there should be no direct communication between the master tenant (MSP) and local tenant networks (that is, no VPN or local connection).
- Port forwarding on the master tenant (MSP) side should be configured to map an external port to the default ports as follows:
- MSP Director to default port 4442
- MSP Transporter to default port 9446
Establish a secure connection to tenants’ environments
- Install the MSP Director on the master site.
- In the multi-tenant Onboard Transporter settings, select the Enable Direct Connect for this node checkbox, and enter the configured Public IP and Public Port for the MSP Transporter.
- From the main dashboard, click + > New local tenant.
- Create a local tenant and allocate the Onboard Transporter to the created tenant
- Navigate to the Nodes tab of the local tenant you created, click the download button, and select Direct Connect Transporter for Windows/Linux.
- In the pop-up window, enter the configured Public IP of the MSP Director, keep port 4442 as default and create a user for Direct Connect.
- Download and install the Direct Connect Transporter at the remote (local tenant) site. (A master password is required for the Direct Connect Transporter installation.)
- After installation is completed, go to the Nodes tab of the local tenant and wait for the Direct Connect Transporter acceptance notification.
- In the table, hover over the Direct Connect Transporter, click the three dots … > Accept and then enter the master password you configured for the Direct Connect Transporter.
Use the Direct Connect feature to run backup and recovery jobs
- Navigate to the local tenant and go to Settings > Inventory.
- Click Add New to start the host discovery process (VMware vCenters/ESXi hosts, Microsoft Hyper-V host or cluster, Proxmox VE host or cluster, Physical Machines).
- Select Use Direct Connect and choose the installed Direct Connect Transporter on the remote site.
- Navigate back to Settings on the local tenant > Repositories, click + and create a local repository using the Direct Connect Transporter.
- Create and run a backup job from the remote site host to the new local repository.
- Create and run a backup job from the remote site host to the multi-tenant Onboard Repository.
- Perform a full VM recovery from the remote site repository to the remote site host.
- Perform a full VM recovery from the multi-tenant Onboard Repository to the remote site host.
Test option 2
Expanded Backup Capabilities for Proxmox VE
Adding Proxmox VE Items to the Inventory
- In the web interface, navigate to Settings > Inventory and click + to add a new item.
- On the Platform tab, select Virtual and click Next.
- On the Type tab, select the Proxmox VE host or cluster option and click Next.
- On the Options tab, fill in all required fields, and specify the Type as either Proxmox VE Cluster or Standalone Proxmox VE host.
- If you select Proxmox VE Cluster: Make sure the cluster is successfully discovered and a transporter is deployed in each cluster host in Nodes (Settings > Nodes).
- If you select Standalone Proxmox VE host: Make sure the host is successfully discovered and a transporter is deployed for the Standalone Proxmox VE host in Nodes (Settings > Nodes).
- Click Finish to add the Proxmox VE host or cluster along with VMs and VM Templates to the Inventory.
Proxmox VE VM template backup
- Navigate to Data Protection, click (+) and select Backup for Proxmox VE.
- At the Source step, select one or more VM templates to back up by placing a checkmark to the left.
- Complete the Destination, Schedule and Options steps and run the job.
Instant VM recovery with Flash Boot
- Head to Data Protection, click (+) and select Backup for Proxmox VE.
- At the Source step, select one or more VMs to back up.
- Complete all the steps and run the backup job.
- Go back to Data Protection, and click Recover > Flash boot for Proxmox VE.
- At the Backup step, select the VM backup you just created.
- Complete the Destination, Schedule and Options steps and run the job.
- Verify the recovered VM is bootable.
- Verify the integrity of the data within the VM and ensure all files, configurations and applications are correctly displayed in the host.
Proxmox VE VM replication
- Navigate to Data Protection, click (+) and select Replication for Proxmox VE to open the replication wizard.
- At the Source step, select one or more VMs to replicate.
- Complete the wizard steps: Destination, Networks, Re-IP and Schedule/Retention.
- Finally, set up the replication job Options and run the job.
Test option 3
Granular Backup for Physical Machines
Make sure you have added a Linux or Windows physical machine to the solution inventory.
File-level Backup for Physical Machine Job
- Navigate to Data Protection, click (+) and select File level backup for physical machine to open the wizard.
- At the Source step, select the physical machines and specify the volumes and folders you want to back up in the Select Folders popup. Note that for this version, selecting files is not supported.
- At the Destination step, choose a local or cloud repository as the destination.
- Complete the Schedule, Retention and Options steps and run the job.
File-level Backup Copy Job
- Navigate to Data Protection, click (+) and select Backup copy.
- At the Backups step, select the File-level backup you created earlier as a Source.
- Complete all the wizard steps: Destination, Schedule and Retention and set up the job Options.
- Run the backup copy job and ensure it completes successfully.
File Level Recovery Job
- Navigate to Data Protection, and click Recover > File Level Recovery to open the wizard.
- At the Backups step of the wizard, select the backup or backup copy you just created.
- At the Files step, select specific files/folders/volumes from the backup to recover.
- At the Options step, choose one of the following recovery options:
- Restore to a custom location.
- Download to a browser.
- Forward via email.
- Run the recovery job and verify that all items are recovered with their content intact.
Important: Use your business email for all stages of the beta test. For more information, refer to the Beta Program Terms & Conditions. If you have any questions, contact the NAKIVO Support Team.
Leading Brands Trust NAKIVO

What’s New in v11

Agentless Backup for Proxmox VE
- Quickly back up and restore Proxmox VMs without installing guest OS agents to reduce management complexity and save time.
- Create fast incremental backups with change tracking to copy only changed data, reducing storage and backup windows.
- Ensure backup redundancy across various storage options, including local, cloud and S3-compatible storage platforms, NFS/SMB share, deduplication appliances and tape.
- Enable backup encryption and immutability to protect against ransomware and other cyber threats.
- Recover full Proxmox VMs or specific files and application objects to minimize downtime and resume operations as quickly as possible.
Feature Enhancements in v11
Agentless Backup for Proxmox VE
Seamless backup and recovery operations
- Quickly back up and restore Proxmox VMs without installing guest OS agents to reduce management complexity and save time.
- Create fast incremental backups with change tracking to copy only changed data, reducing storage and backup windows.
- Ensure backup redundancy across various storage options, including local, cloud and S3-compatible storage platforms, NFS/SMB share, deduplication appliances and tape.
- Enable backup encryption and immutability to protect against ransomware and other cyber threats.
- Recover full Proxmox VMs or specific files and application objects to minimize downtime and resume operations as quickly as possible.
See NAKIVO Backup & Replication v11 in action!
Experience new backup, ransomware protection and MSP management capabilities.

Feature Enhancements in v11
NAKIVO Backup & Replication is a fast, affordable, top-rated solution, designed to meet the diverse needs of modern enterprises across virtual, physical, SaaS, cloud and application workloads. The solution offers a wide range of advanced features to increase backup performance, improve reliability and automate recovery processes, saving you time and money.
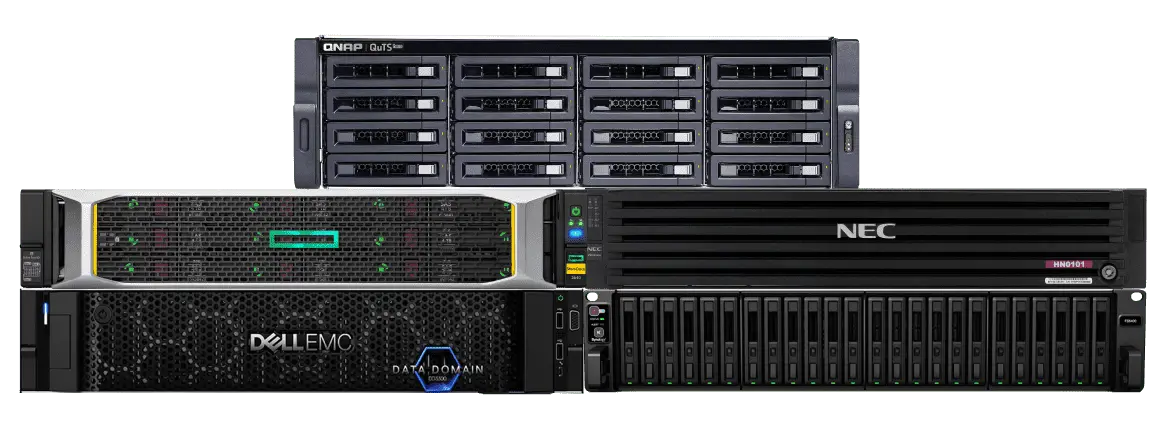
Backup Appliance Based on QNAP, Synology, ASUSTOR, Western Digital or NETGEAR NAS
Hyperconverged data protection and continuous data availability for SMB data centers and ROBO edge computing.
About NAKIVO
NAKIVO is a US-based software vendor dedicated to delivering the ultimate backup, ransomware protection and disaster recovery solution for virtual, physical, cloud and SaaS environments. Over 16,000+ customers in 183 countries trust NAKIVO with protecting their data, including major companies like Coca-Cola, Honda, Siemens and Cisco.
Technology Partners
