Effective Microsoft 365 Data Retention: Complete Implementation Guide
Microsoft 365 data retention allows organizations to keep the needed data for the required period and delete unneeded data to save storage space. Effective retention and proper configuration of Microsoft 365 retention settings help organizations use their Office 365 environments rationally and reduce operational and financial risks. This blog post explains data retention and configuration principles of retention policies and labels in Microsoft 365.
Understanding Microsoft 365 Data Retention
Microsoft 365 data retention refers to the tools and policies available in Microsoft 365 (formerly Office 365) that help organizations preserve, manage and delete data according to business, legal or regulatory requirements. Data is identified, classified and stored in the desired manner for a specific period.
There are two primary purposes of Microsoft 365 data retention:
- Preserve information. Ensure data (emails, documents, chats, etc.) is not lost or deleted before it should be.
- Dispose of information. Ensure outdated or unnecessary data is deleted to reduce risks (such as audit exposure or legal discovery).
Retention can be applied to multiple Microsoft 365 services and corresponding data:
- Exchange Online (emails)
- SharePoint Online (sites, documents)
- OneDrive for Business (user files)
- Microsoft Teams (chat and channel messages)
- Yammer, Viva Engage, etc.
If a retention policy is applied, a copy is preserved in a separate location (like the Preservation Hold Library for SharePoint/OneDrive or the Recoverable Items folder for Exchange) even if a user deletes a file or email. Once the retention period expires, the item can be automatically deleted. Microsoft 365 retention helps with compliance (such as GDPR, HIPAA or SEC regulations) and reduces the risk by cleaning up old data properly.
Retention settings can be configured so that when a user deletes content, the original content is automatically copied to a different location. If you configure a retention policy for a larger container, smaller objects inside these containers, such as mailboxes, SharePoint sites, etc., inherit the parent retention policies.
In the table below, you can see which types of Microsoft 365 content can be retained.
| Content type | Retention policy | Retention label |
| Exchange email | + | + |
| SharePoint sites | + | + |
| OneDrive accounts | + | + |
| Microsoft 365 groups | + | + |
| Exchange public folders | + | – |
| Microsoft Teams channel messages | + | – |
| Microsoft Teams chats | + | – |
| Microsoft Teams private channel messages | + | – |
| Yammer community messages | + | – |
| Yammer user messages | + | – |
If there are conflicts in the configuration, the following Microsoft 365 retention principles are used in the following order:
- Retention wins over deletion.
- The longest retention period wins.
- Explicit wins over implicit for deletions.
- The shortest retention period wins when deletion is specified.
These four principles are explained below.
- Retention Policy #1 deletes content after 1 year and Retention Policy #2 retains content for 2 years. The retention period is longer for policy number 2 and as a result, the retention period for 2 years is applied. When the 2-year retention period expires, data is deleted according to policy number 1.
- Two retention policies and one retention label are applied to an item.
- Retention policy #1 is configured to retain data for 1 year.
- Retention policy #2 is configured to retain data for 5 years.
- The retention label is configured to retain data for 2 years.
The retention policy #2 has the longest retention period in this scenario and as a result, the item is retained for 5 years.
- Retention policy and retention label are applied to an item.
- Retention policy #1 is configured to delete an item after 1 year.
- Retention label #1 is configured to delete an item after 2 years.
The retention label is explicitly applied to the item and as a result, the item is deleted after 2 years.
- Two retention policies are applied to an item.
- Retention policy #1 is configured to delete an item after 1 year.
- Retention policy #2 is configured to delete an item after 2 years.
The shortest period wins in this scenario and the item is deleted after 1 year.
Microsoft 365 Built-In Data Retention Tools
Retention policies and retention labels are the main features used for managing data. They allow organizations to keep important information for a set period (even if users delete it) and/or automatically delete information after it is no longer needed.
Retention labels
Retention labels allow you to tag individual items like an email, a document or a Microsoft Teams chat with specific retention settings. Users can manually apply labels. Moreover, administrators can configure auto-application based on conditions (such as keywords, sensitive information or location).
The primary purposes of retention labels are:
- Apply custom retention rules to specific content (for example, “Keep for 7 years, then delete”).
- Classify information based on business or compliance needs (e.g., “Financial Records”, “Customer Contracts”).
For example, a user can label an important customer contract to be retained for 7 years, even if the document is moved or renamed.
Retention policies
Retention policies automatically apply retention rules across large content sets without requiring users to do anything. The main purpose of Microsoft 365 retention policies is to protect data at the container level (mailboxes, SharePoint sites, OneDrive accounts, Microsoft Teams chats, etc.). Policies are scalable across thousands of users and locations and can be used to set universal rules like “Retain all emails for 5 years” or “Delete Teams chat messages after 1 year”. With retention labels, you can apply retention policies for specific items, like emails or documents. After publishing, users can add retention labels to their content.
The main differences between policies and labels are:
- Retention policies are broader and automatic.
- Retention labels are more granular and item-specific.
Microsoft 365 retention policies and labels work together for compliance and lifecycle management.
Configuring a retention policy for the entire mailbox is more effective than doing so for each email individually. At the same time, some emails can be individually marked with retention labels if they must be retained for longer.
eDiscovery and litigation holds
eDiscovery is a special Microsoft 365 feature that helps you search, identify, preserve and export content related to legal cases or investigations. Microsoft eDiscovery can be used for multiple purposes:
- Find and collect emails, files, chats and other information across Microsoft 365.
- Place a hold on data during a legal case (as a result, the data cannot be deleted, even by retention policies).
- Export evidence for legal review.
For example, if a company faces a lawsuit, admins can use eDiscovery to freeze relevant emails and documents to ensure they cannot be deleted and produce them as evidence.
Litigation hold is a special feature, primarily for Exchange Online mailboxes, that preserves all mailbox content, including deleted and edited items. Once placed on hold, nothing in the mailbox is permanently deleted, regardless of the regular deletion actions. eDiscovery and litigation hold are used for legal protection and evidence management.
Litigation hold is usually used in the following scenarios:
- Freeze a user’s mailbox content indefinitely or until the hold is removed.
- Even if users delete emails, they remain hidden but retrievable.
- Often used during active lawsuits or audits.
For example, if an employee is under investigation, you can place their mailbox on litigation hold to ensure that all emails (sent, received or deleted) are preserved exactly as they were. Retention policies, labels, eDiscovery and litigation hold complement each other to provide full data governance across Microsoft 365.
Setting Up Data Retention Policies Across Microsoft 365 Services
You can configure Microsoft 365 retention policies in the provided web interface. Let’s explain how to create a retention policy in Office 365.
- Open the Microsoft Purview portal by opening the link:
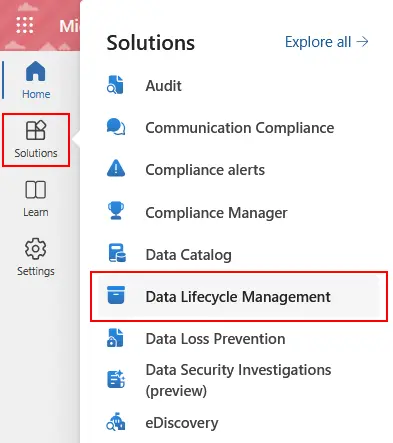
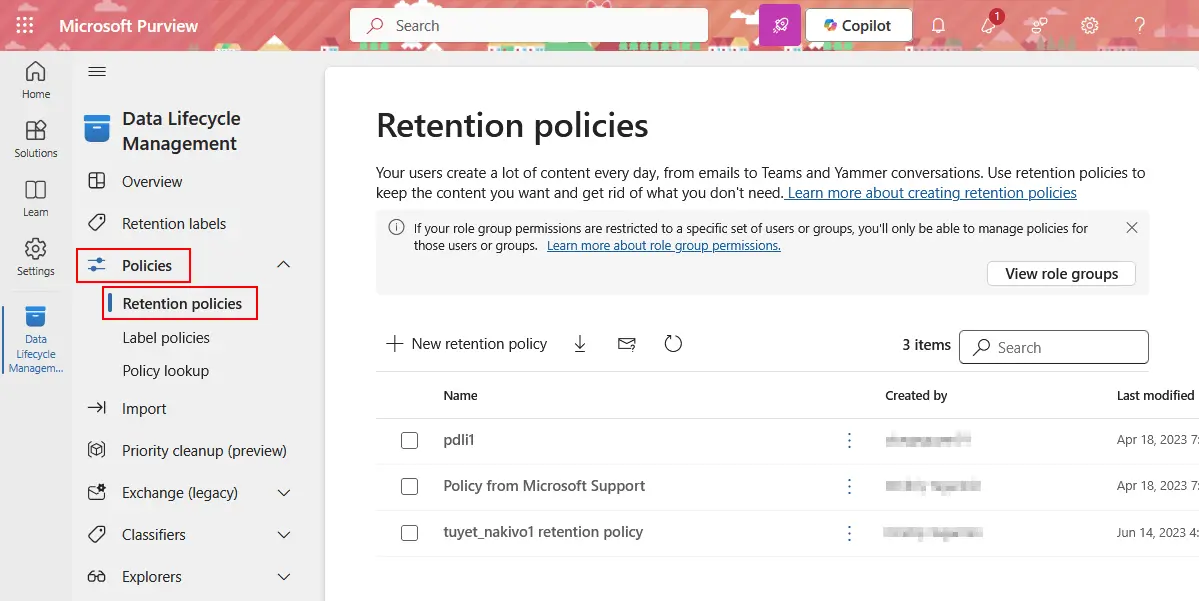
- On the main page of the Purview portal, go to Solutions > Data Lifecycle Management.
- Click Policies > Retention policies. You can view, edit and create Microsoft 365 retention policies on this page. Click + New retention policy to create a new policy.
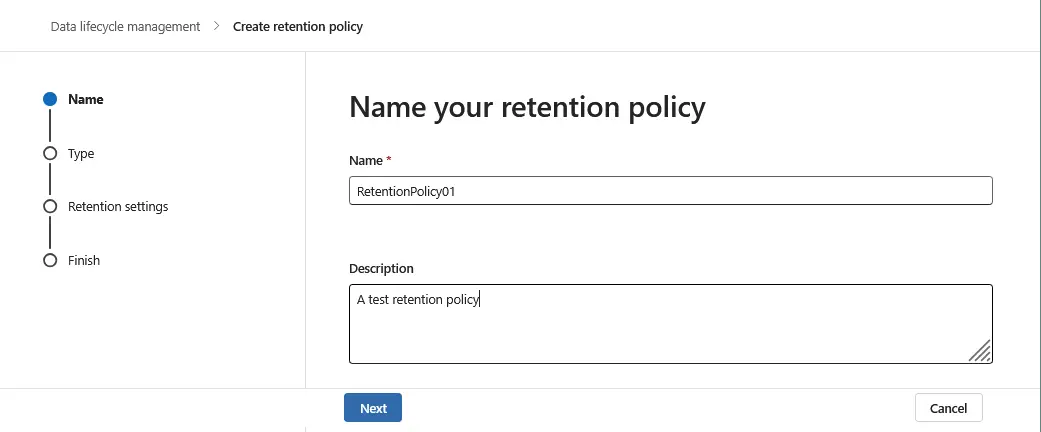
- A new wizard to create a Microsoft 365 retention policy opens. Enter a policy name and description. Click Next at each step of the wizard to continue.
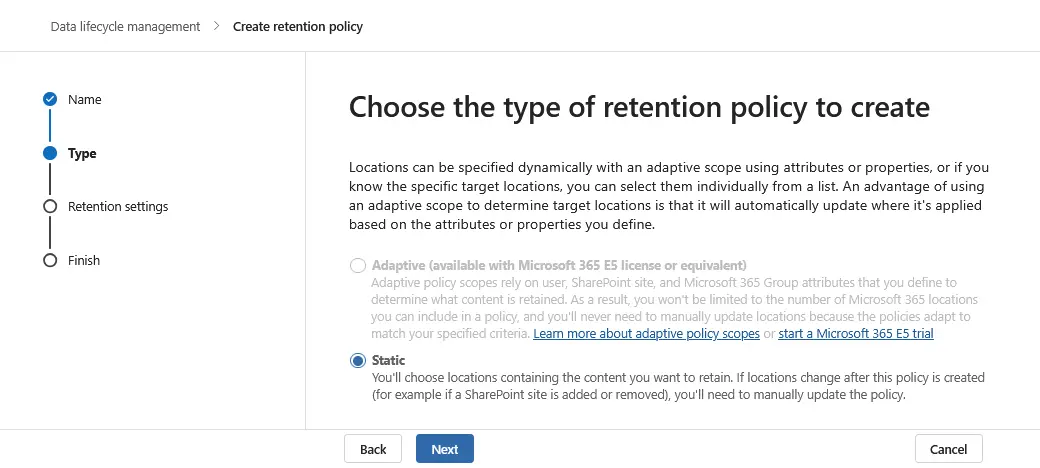
- Choose the type of Microsoft 365 retention policy to create (Static or Adaptive). Let’s select Static in this example.
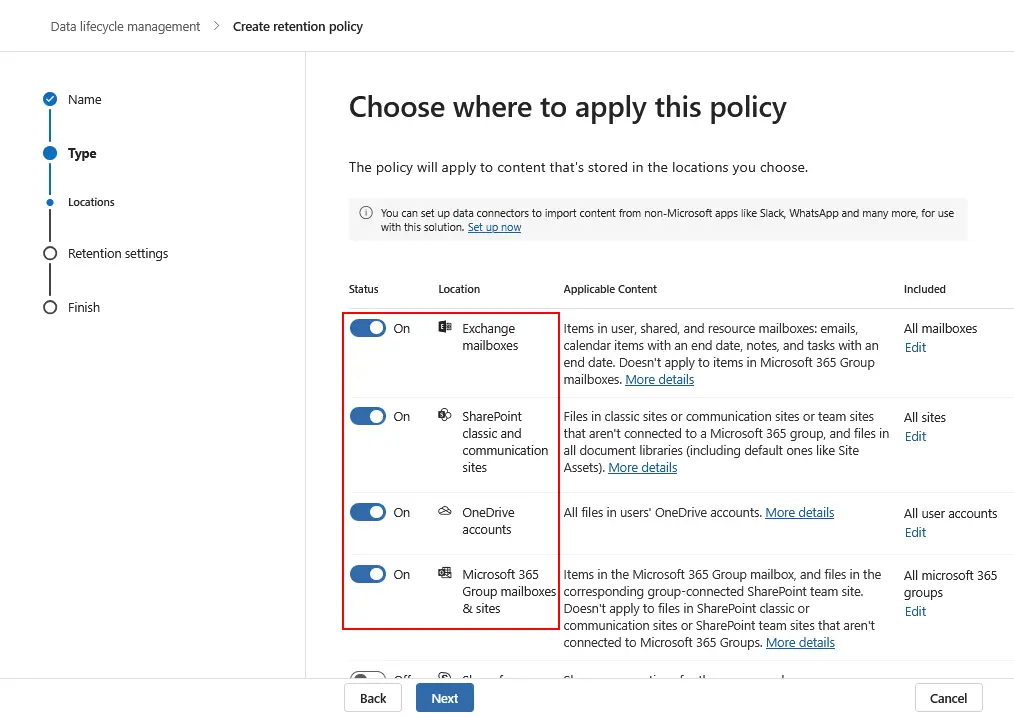
- Choose where to apply this Microsoft 365 retention policy. The main options are:
- Exchange mailboxes
- SharePoint classic and communication sites
- OneDrive accounts
- Microsoft 365 group mailboxes and sites
Select Exchange mailboxes to configure a Microsoft 365 email retention policy.
Additional options are:
- Exchange public folders
- Microsoft Teams channel messages
- Microsoft Teams chats and Copilot interactions
- Microsoft Teams private channel messages
- Yammer community messages
- Yammer user messages
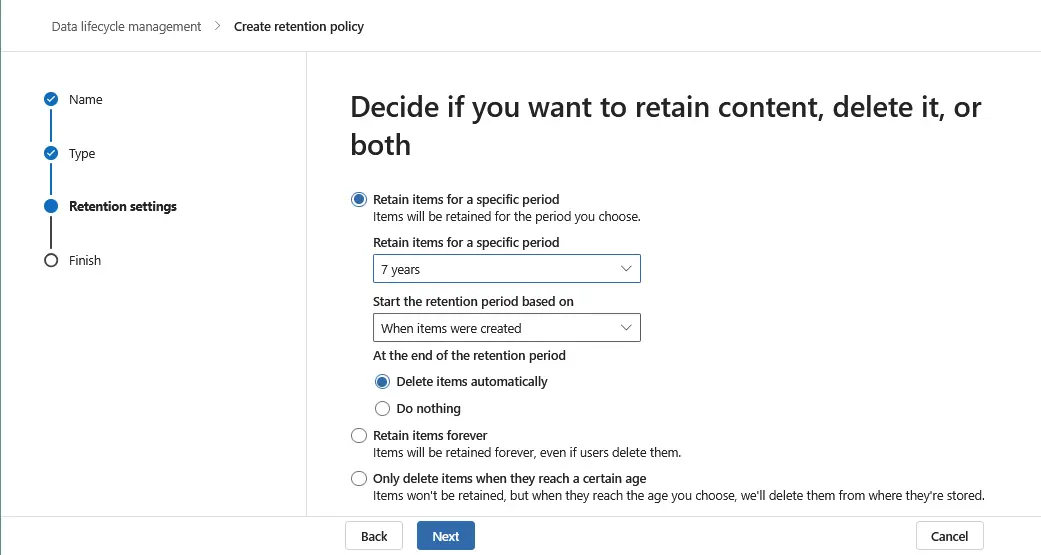
- Decide if you want to retain content, delete it or both. Select one of the three options:
- Retain items for a specific period.
- Retain items forever.
- Only delete items when they reach a certain age.
When retaining items for a specific period, select the period and when to start it. Additionally, you can choose what to do at the end of the retention period.
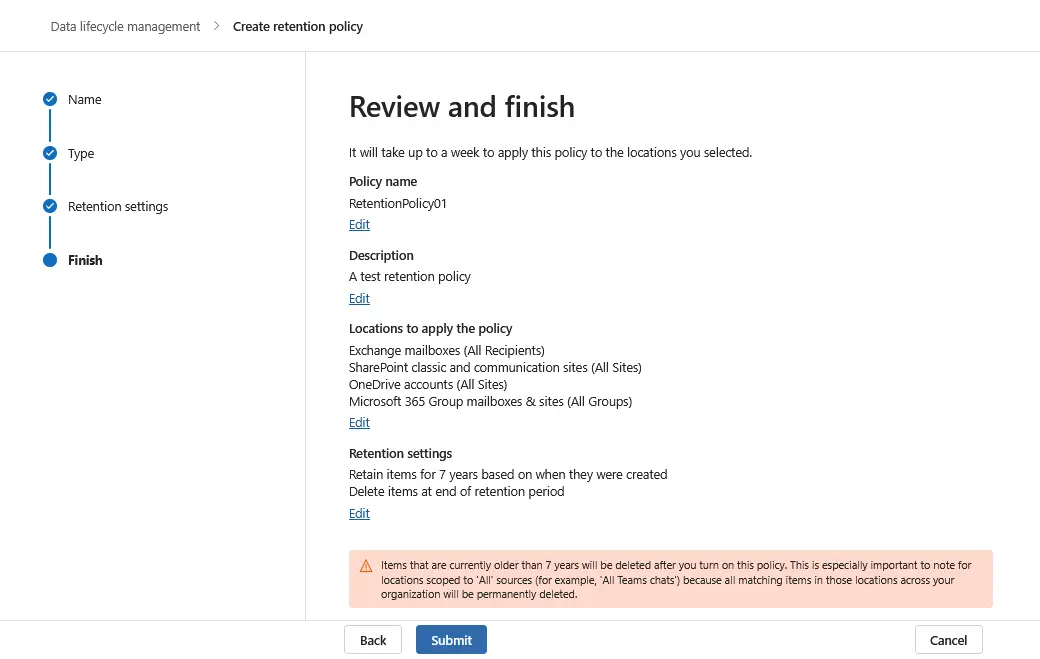
- Review the Microsoft 365 retention policy and if everything is correct, click Submit.
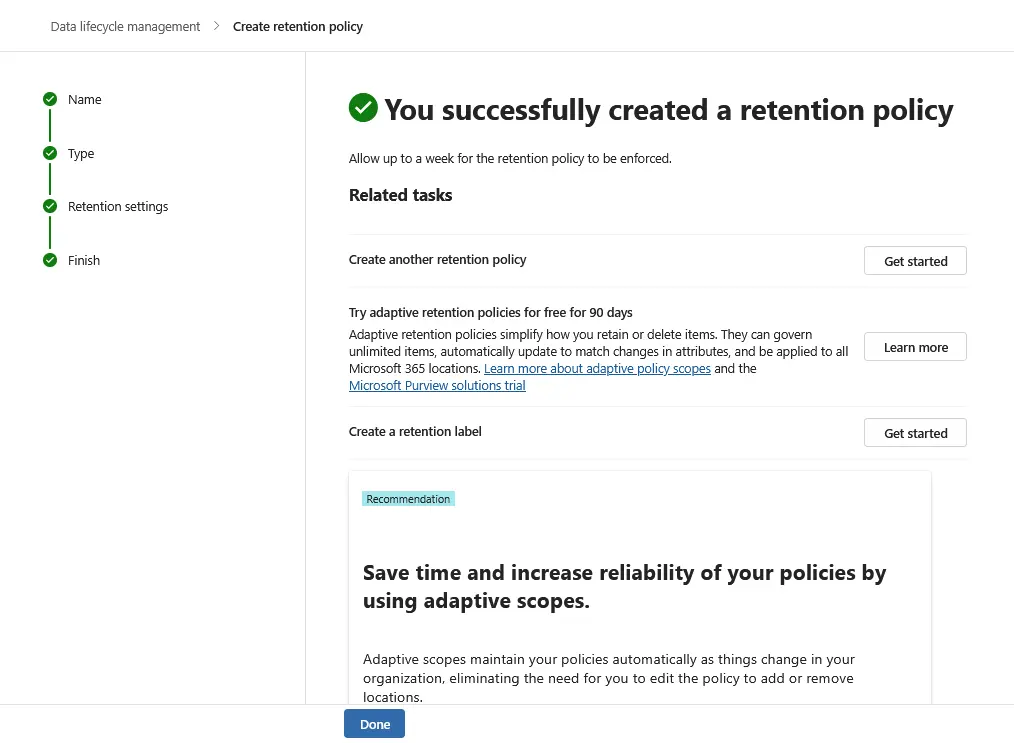
- If everything was configured correctly, you should see a message that you successfully created a retention policy. Click Done to finish the wizard and close this window.
Retention Labels
Configuring retention labels is different from configuring retention policies.
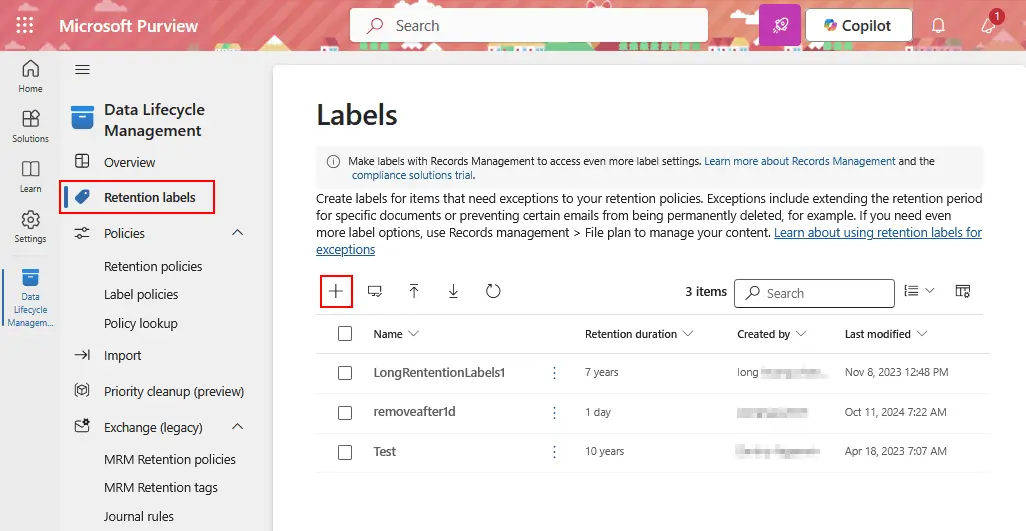
- Open the Microsoft Purview portal, go to Data Lifecycle Management and click Retention labels. On this page, you can view, edit and create labels. Click + to create a new Microsoft 365 retention label.
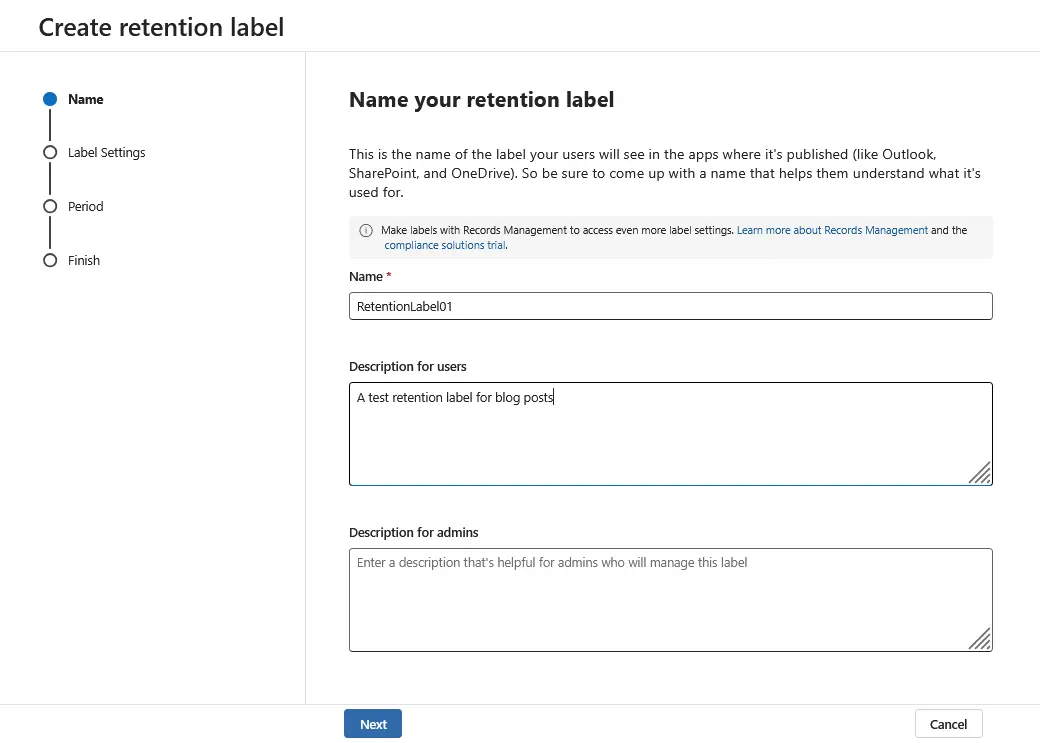
- A new wizard to create a Microsoft 365 retention label opens. Enter the name and description for the retention label. Click Next at each step of the wizard to continue.
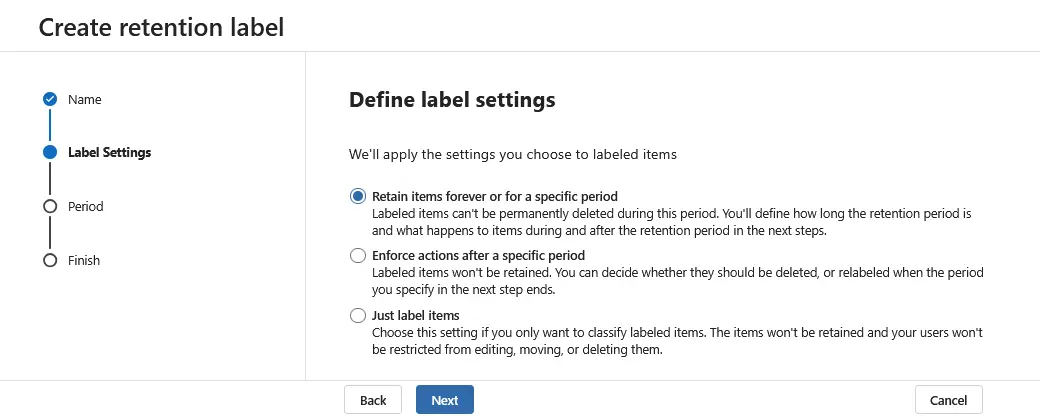
- Define one of the available retention label settings:
- Retain items forever or for a specific period.
- Enforce actions after a specific period.
- Just label items.
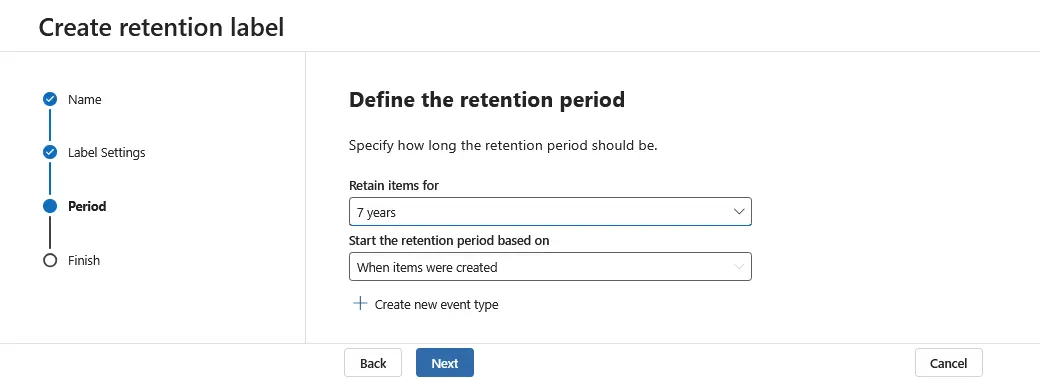
- Define the retention period. Specify how long the retention period should be and when to start it.
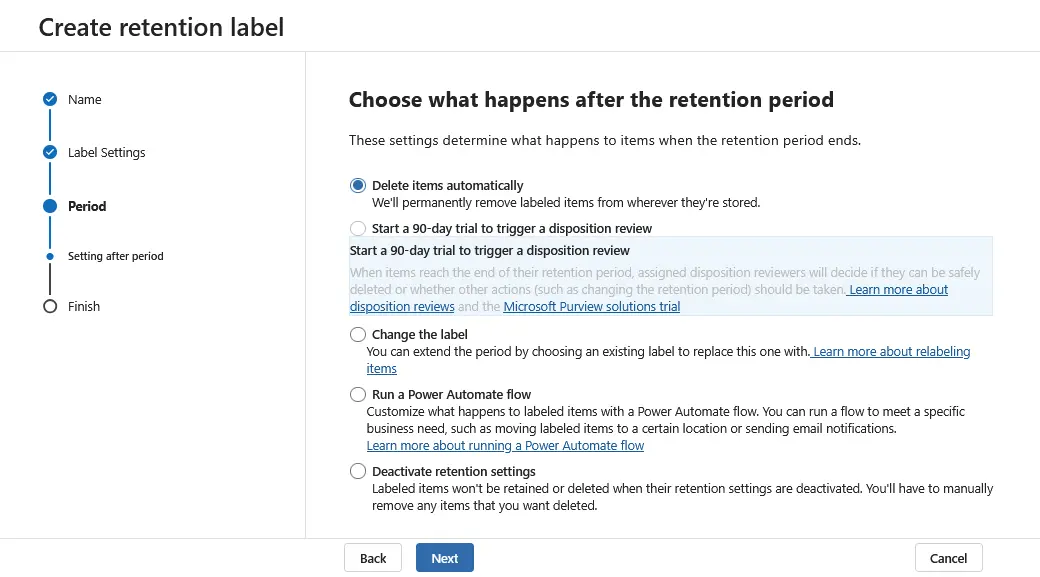
- Choose what happens when the retention period ends:
- Delete items automatically.
- Start a 90-day trial to trigger a disposition review.
- Change the label.
- Run a Power Automate flow.
- Deactivate retention settings.
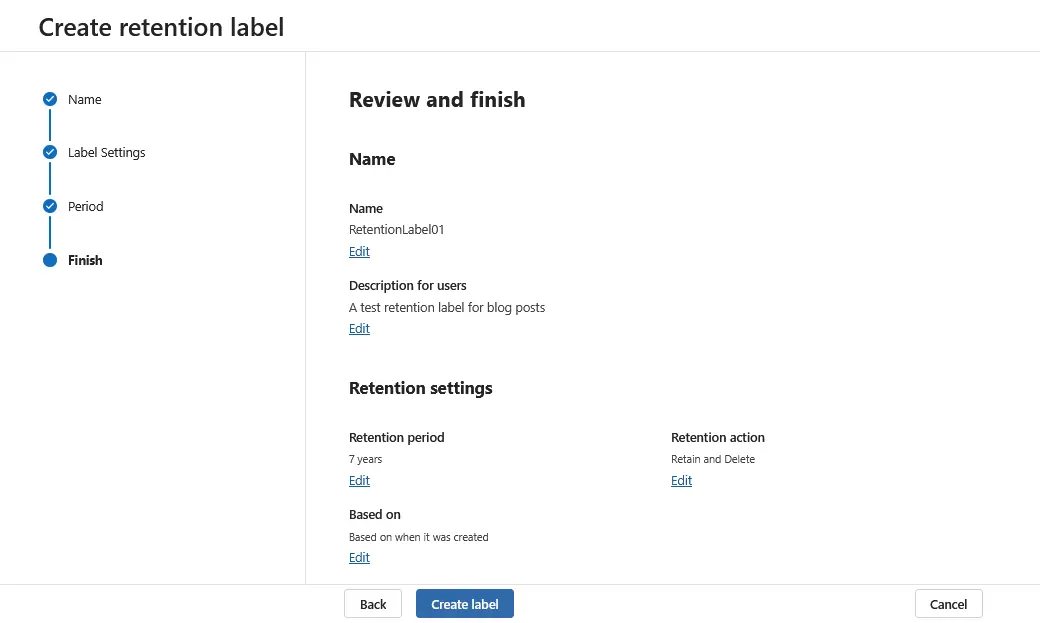
- Review the settings for your Microsoft 365 retention label and, if everything is correct, hit Create label.
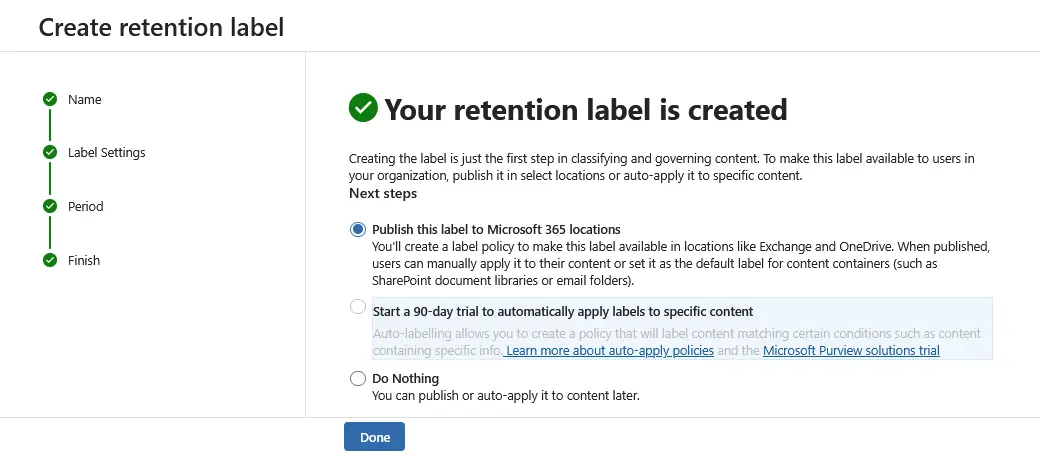
- You should see a message that your retention label has been created. After that, you should make this label available to users in your organization and select one of the following options:
- Publish this label to Microsoft 365 locations.
- Start a 90-day trial to automatically apply labels to specific content.
- Do nothing.
Hit Done to continue.
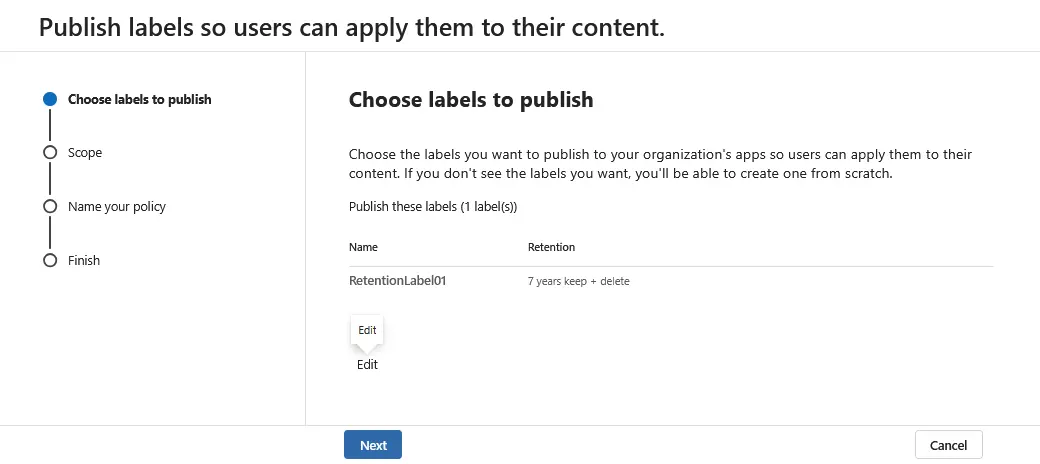
- The additional wizard to publish labels in your Microsoft 365 organization opens. Choose labels to publish. Select a previously created Microsoft 365 retention label and click Next.
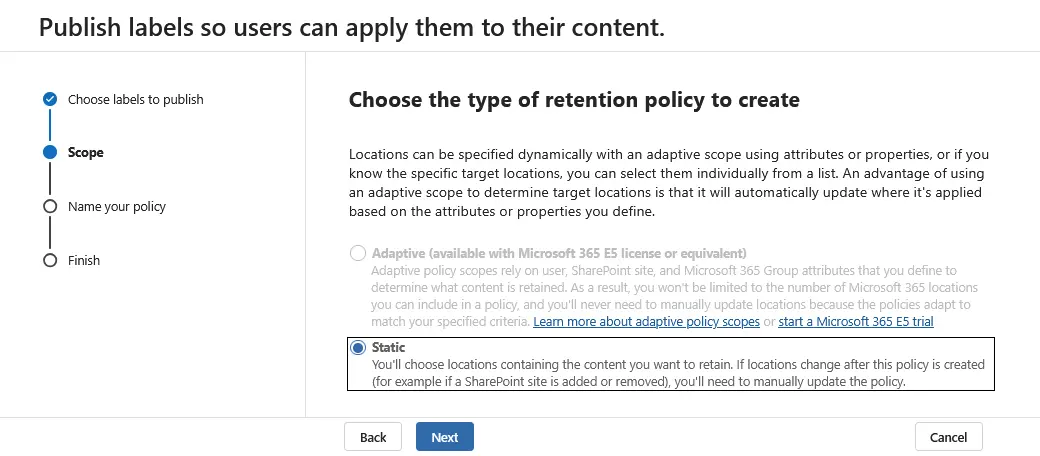
- Choose the type of retention policy to create. Select Static or Adaptive. Note that a Microsoft E5 subscription plan or equivalent is required to use the Adaptive option.
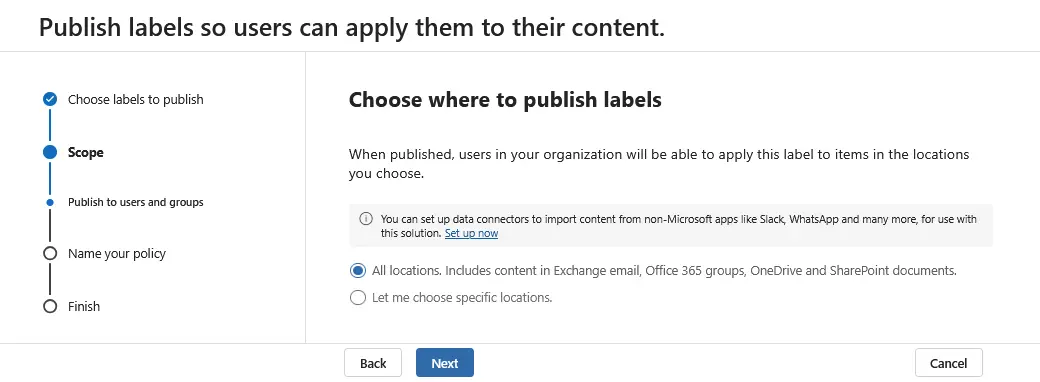
- Choose where to publish labels:
- All locations. Includes content in Exchange email, Office 365 groups, OneDrive and SharePoint documents.
- Let me choose specific locations.
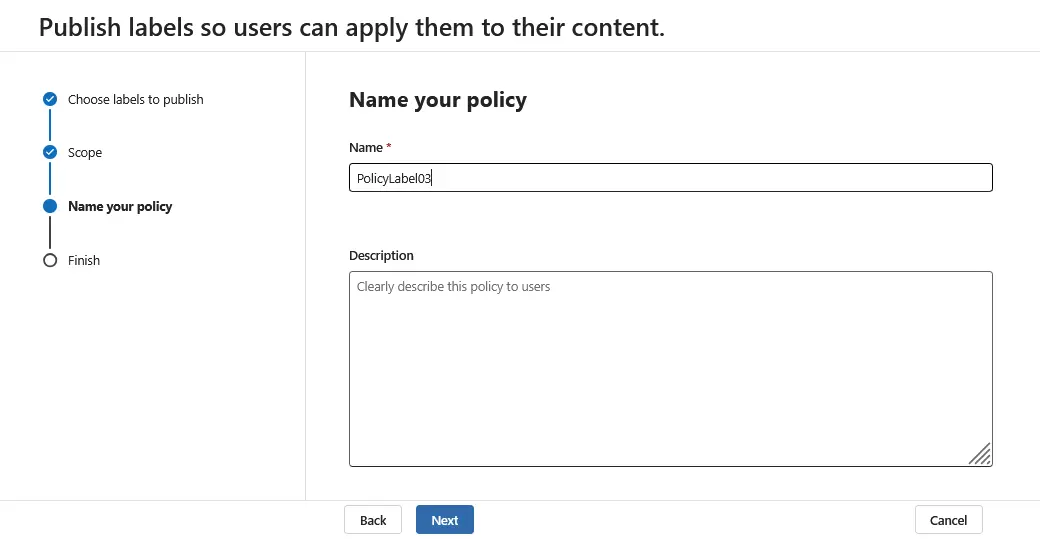
- Enter the name of your policy with retention labels. Optionally, you can enter a description.
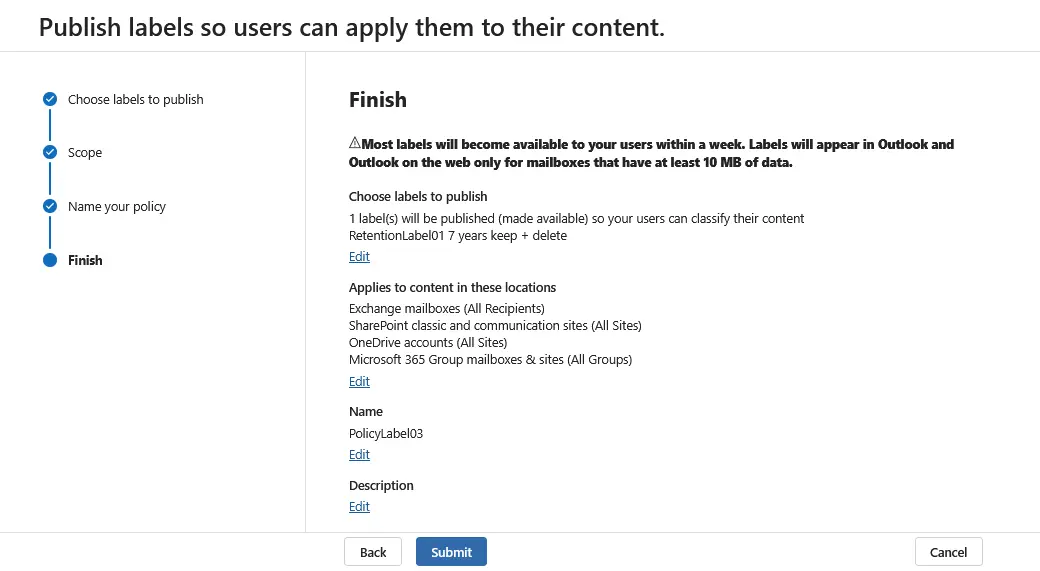
- Check the configuration for your label and read the description about how labels are applied. Hit Submit when you’re ready to continue and finish.
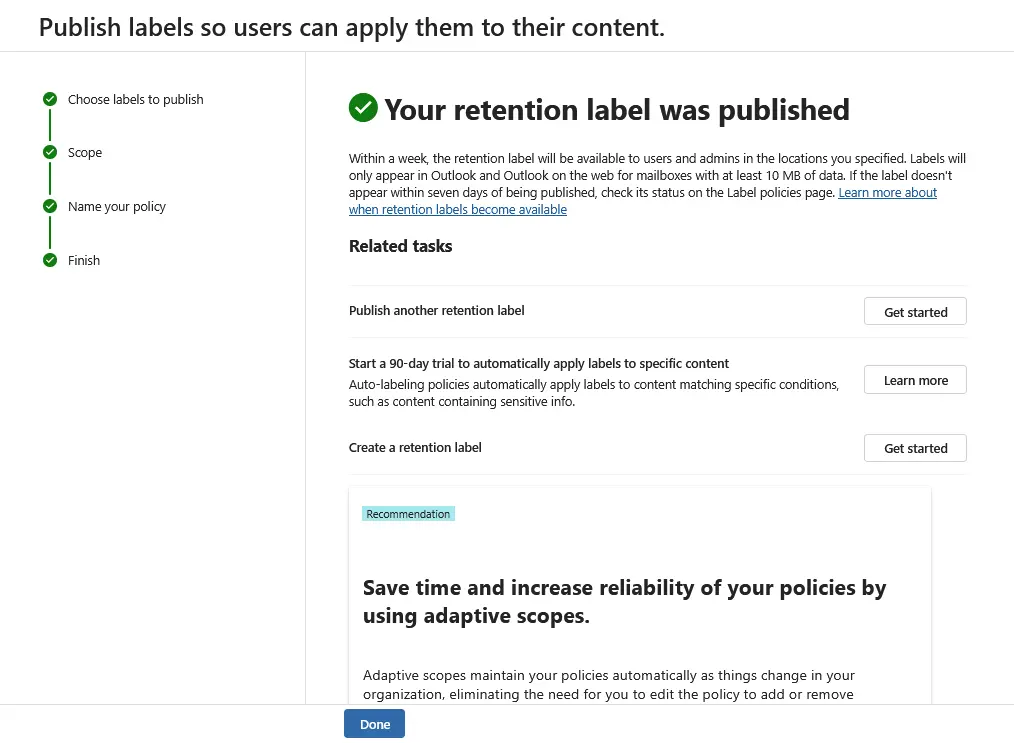
- You should see a message that your retention label was published. Click Done to finish.
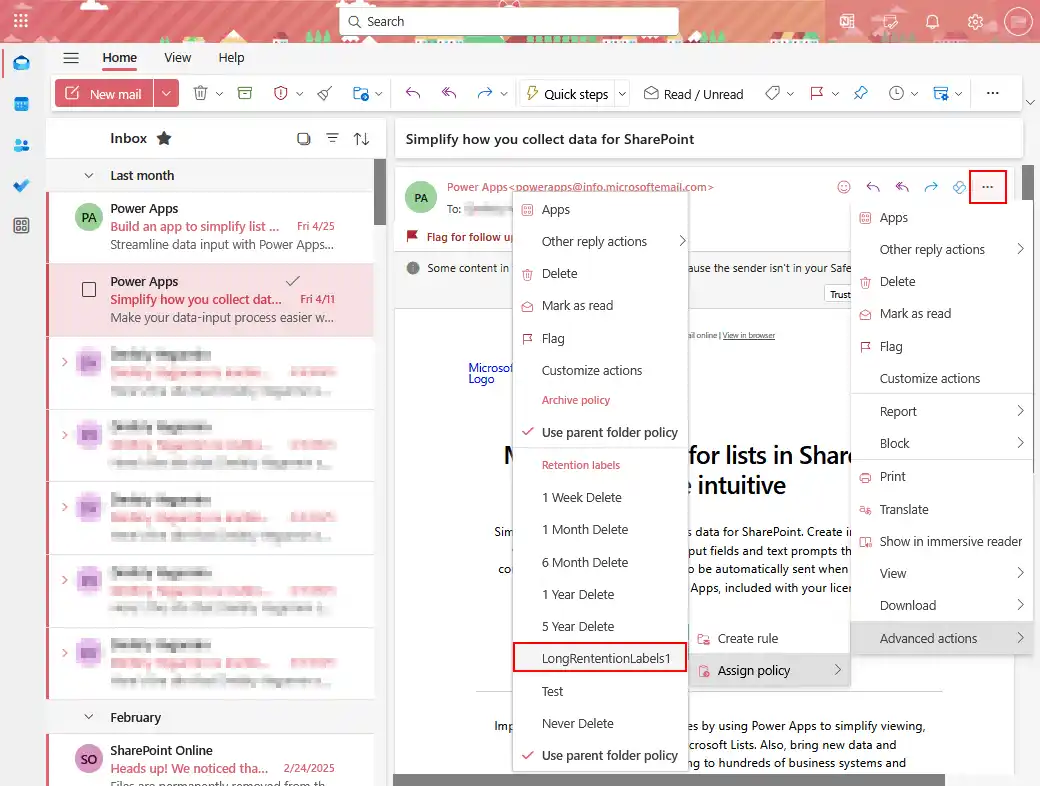
After that, users can assign retention labels for specific objects. In the example below, you can see how to assign a retention label to an email message in Microsoft 365 Outlook Online.
- Select the email message.
- Click the three dots … icon, click Advanced options > Assign Policy and select a retention label in the appropriate section.
Common Microsoft 365 Data Retention Pitfalls to Avoid
When setting up Microsoft 365 data retention policies, organizations often make common mistakes that can lead to legal, regulatory and operational risks. Let’s explore these mistakes and explain how to avoid them.
Over-retention: keeping data for too long
Organizations sometimes keep data far longer than necessary, either out of caution (“just in case we need it”) or because no clear expiration rules are set. It can cause serious legal risks because old data can be discoverable during lawsuits, even if irrelevant. Another issue is the increased storage costs since unnecessary data consumes storage resources. More data makes search, compliance and governance tasks slower and more complicated, which leads to more complex data management.
To avoid over-retention:
- Define clear retention periods based on business, legal and regulatory requirements.
- Set expiration dates for different data types (for example, 7 years for contracts, 1 year for chats, etc.).
Under-retention: deleting data too early
Organizations sometimes configure retention settings that accidentally delete important data before it’s legally safe. These actions cause regulatory violations, such as non-compliance with data retention laws (i.e., GDPR, HIPAA, SEC rules), which can lead to heavy fines. It also leads to business disruption when losing valuable records, which can damage customer relationships or cause operational issues. Missing records in litigation can severely weaken a legal defense.
To avoid under-retention, consider the following measures:
- Consult legal and compliance teams to understand minimum retention requirements.
- Implement a retention-before-deletion approach: First, retain for the required period, then allow deletion.
Inconsistent policy enforcement
Retention settings are not consistently applied across all users, teams, departments or workloads (like SharePoint or Exchange). This causes compliance gaps because some data is properly retained, while other critical data isn’t. Users don’t know which rules apply, leading to manual mistakes and confusion. Regulators may view inconsistency as non-compliance and audit failures.
To avoid inconsistent policy enforcement:
- Use centralized, automated retention policies where possible (apply at the container or service level).
- Regularly review and audit retention settings to ensure coverage and consistency.
- Document your data governance approach clearly and train relevant teams.
Microsoft 365 Data Retention vs. Backup: Why You Need Both
While data retention and backup might sound similar at first glance, their purposes are different. Both of them are needed to fully protect data in an organization.
Data retention
Microsoft 365 retention policies are designed to control how long data is kept for legal, regulatory or organizational requirements. They preserve or delete content systematically.
Features of Microsoft 365 retention:
- Keep data for a legally required period (e.g., 7 years).
- Automatically delete data when it’s no longer needed.
- Hold deleted content invisible to users but available for eDiscovery.
- Designed mainly for compliance (GDPR, HIPAA, SOX, etc.).
Limitations of Microsoft 365 retention:
- This feature doesn’t create a traditional backup (copy stored separately).
- Data can be lost if it is corrupted, accidentally overwritten or a user deletes it without a retention policy.
- Retention policies cannot easily restore data to its original state in bulk (for example, recovering an entire site or mailbox after a ransomware attack).
Data protection and recovery
Backup solutions (third-party or Microsoft’s native offerings) create independent copies of data that can be restored quickly.
Features of data protection solutions:
- Protect against accidental deletion, ransomware, corruption and malicious attacks.
- Perform full recovery of mailboxes, OneDrive accounts, SharePoint sites, Microsoft Teams conversations, etc.
- Store backup copies outside the production environment (for true resiliency).
Limitations of data protection solutions:
- Backup usually doesn’t enforce compliance rules like “keep this document for 7 years.”
- Backup focuses on recovery, not legal data preservation.
You should consider using both Microsoft 365 data retention and backup because:
- Without retention: You might accidentally delete or lose legally important data, risking compliance fines.
- Without backup: You might lose all data from a cyberattack, corruption or accidental mass deletion and be unable to recover efficiently.
In short:
Retention – “We control and preserve what data we must keep or delete over time.”
Backup – “We can quickly recover anything we lost or destroyed.”
Thus, it is recommended that you configure Microsoft 365 retention settings and back up Microsoft 365 data regularly.
How NAKIVO Helps with Microsoft 365 Data Protection
NAKIVO Backup & Replication is a comprehensive data protection solution that supports Microsoft 365 backup. The NAKIVO solution provides advanced retention settings for Microsoft 365 backups and backups of other supported platforms. You can configure how long to store specific recovery points and configure multiple retention rules for each backup job. One of the most rational strategies is implementing the GFS retention policy.
This way, you keep more new (the most recent) recovery points and fewer old ones. This approach allows you to conserve storage space and recover data backed up in different periods. Configuring retention settings in NAKIVO Backup & Replication makes data protection for Microsoft 365 more reliable. If data is deleted in the Microsoft 365 environment due to misconfiguration of native Office 365 retention policies or cyber-attacks, you can recover it from backups created with the NAKIVO solution.
You can store backups in the cloud and local storage (on-premises). Backups are encrypted and can be made immutable to ensure optimal ransomware protection. Microsoft 365 data can be recovered granularly to the source or a custom location.
Conclusion
Microsoft 365 retention policies and labels are useful for configuring how long each type of data should be stored and when it should be deleted. The most common way to configure retention settings is using the web interface of the Microsoft Purview portal. To prevent possible issues, it is recommended to avoid over-retention and under-retention when configuring policies. The best practice includes configuring Microsoft 365 backup with NAKIVO Backup & Replication in addition to the native Microsoft 365 retention settings.